
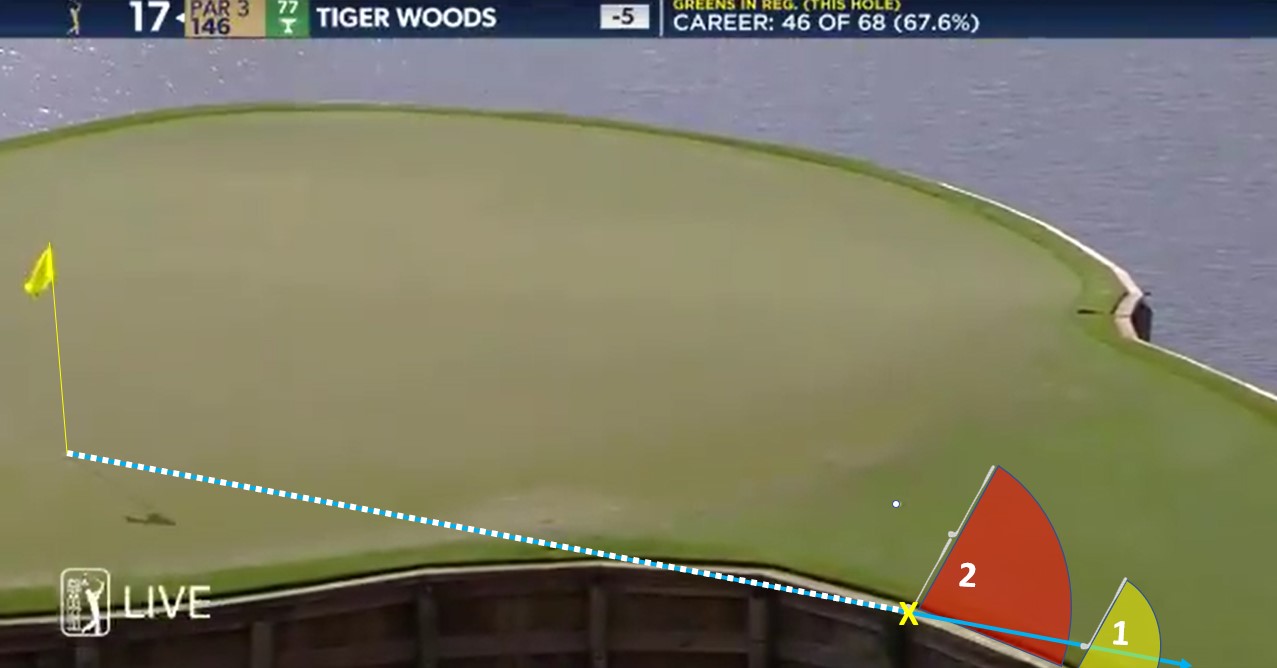
The top Pros spend hours practicing to reach the incredible level of skill they show every week, so you wonder why they (or their caddies) don’t spend a little more time ensuring they know the rules as that knowledge can also save them valuable strokes. Take Tiger’s 7 at the Par 3 17th at Sawgrass in the Player’s Championship last week. The picture below has Tiger’s ball still moving and roughly level with the hole, before it rolled into the Penalty Area at point X.
He chose to play from the drop zone on the far side of the lake, but he did have other options which would have left him with an easier third shot:
- Firstly, he could have gone back on line from point X along the solid blue line and then dropped within 1 club length of a chosen reference point (e.g. in the yellow area marked 1)
- Secondly, If it was marked as a Red Penalty Area (or if it wasn’t marked at all), he could have dropped within 2 club lengths of, but not nearer the hole than, point X (i.e. in the red area marked 2)
- Or, he could have played again from the teeing area
If he had chosen option 1 or 2 he would have had an outside chance of a par and would surely have expected to make 4 at worst. Bearing in mind his career stats of missing this green once in every 3 goes (Green in Regulation Stat at the top of the picture) they must have been better options, even for a golfer of his skill.
The video showing how he ended up with a seven is here: Tigers Quadruple Bogey
